OWACurrent en:Add In Settings
Overview
The Add-in settings allow the end user to configure key elements of the Cryptshare for OWA add-in. This includes changing the preferred language, enabling dark mode, and obtaining the Client ID necessary for Remote Logging setup.
In order to access the Add-in settings, users should follow this procedure:
- Open the add-in on any message.
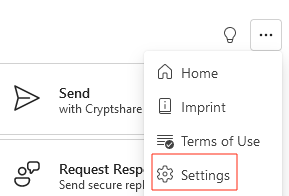
- Click the three dots (...) to open the main add-in menu.
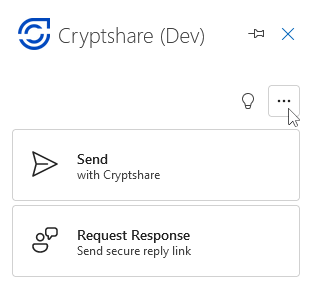
- Click "Settings" to open the General Settings view.
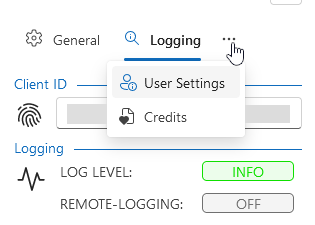
- To access any other settings view, use the menu at the top of the settings page.


General Settings

The Cryptshare Server URL displays the server from which this add-in is hosted, and will obtain its settings from. Please note that the Server URL is unchangeable.
Display Mode
The Cryptshare for OWA add-in supports being displayed in "dark mode", opposed to the default appearance. The dark display mode is characterized by dark backgrounds with bright elements, matching the "dark mode" of Outlook on the Web. The chosen setting will be applied automatically upon save.
The "Light" option will force the add-in to its default appearance. Conversely, the "Dark" option will force the add-in to the inverted appearance. If "Use system preferences" is selected, the add-in will automatically follow the color scheme set by the browser the add-in is opened in. This color scheme, depending on the browser, may be defined by the global system settings.
Language
The language setting affects the language the add-in is displayed in. On first startup, the add-in language will be set to your default browser locale, if the equivalent language package is available on the Cryptshare Server. This language selection may be changed at any time from this setting.
Logging Settings

The Cryptshare for OWA add-in by default logs information to the JavaScript browser console. Considering the likely high amount of users/clients working with the add-in, error analysis may become time-consuming and complicated. To facilitate diagnosis for administrators and users, the add-in may be set up to send logged information to the Cryptshare Server. This feature is also referred to as "Remote Logging". This allows administrators to receive the logged information from several clients at a central location.
Client ID
The Client ID is unique to every installation of the add-in, identifying the location of the logs that may be received by remote logging. It is necessary to activate remote logging on the Cryptshare Server for every client.
Logging
This section of the Log settings view informs the user of the current status of remote logging, and if enabled, which log level is currently set.
Activating Remote Logging
In order to activate remote logging for the add-in, the Cryptshare Server administrator needs the client ID of this particular installation. The user may copy this Client ID from the "Client ID" section in the settings view by clicking the text field. The entire ID will automatically be selected to facilitate easy copying to the clipboard using Ctrl+C.
If you are the administrator and have received the client ID from the user who wishes to implement remote logging, please refer to the Server documentation on Remote Logging to enable the transmission of logs.
User Settings

In order to send Cryptshare Transfers, it is necessary to supply some contact details in case the recipient of the transfer needs to contact the sender for any additional information.
This information will be requested by the add-in when attempting to send a new transfer, if it is not currently set.
Using the User Settings menu, it is possible to modify the name and phone number associated with any newly created transfers. The used e-mail address will always match the currently logged in account for Outlook on the web.
To change these settings, simply enter the desired values and click the "Save" button.